Show a text in a Text Box with Select All Button

Posted by Tricks Guru In | 0 comments»
People are always looking to make their blog look so nice and professional. In order to make it more professional, some kind of editing is needed than just using the blogger's default settings. This post shows how to highlight a particular text or highlight specific code from the rest of the texts that contain post or form the whole blog template.

This has another very important use too. For an example lets say that you have a long html/css code with you and  you need your blog readers to copy that code from your blog or your website. If the code is big enough, you readers would face a difficulty when scrolling down and coping the whole content.


But what if you can enter the whole big code in a small text box with a button to select all. Then that would be great. It will give a compact, professional looking for your blog and an easy solution to your readers as well.

For an example let's say your sidebar is 180 px wide and 200 px high and you need to insert a html code which can be copied by your readers. You may wonder how this is done. Because if you add a html code, it will be automatically converted in the html widget it self. But by this method, that is possible. Just look at the picture. The code is there in the text box. So readers can copy it and paste in their blog.

The same example is shown below as a gadget. Just have a look.


Now let's go for the code for the above widget. The code will look like below.

<div>
<form name="select">
<div align="center">
<input onclick="javascript:this.form.txt.focus();this.form.txt.select();" type="button" value="Select the Below Text" /></div><div align="center"></div>
<p align="center">
<textarea style="WIDTH: 190px; HEIGHT: 100px" name="txt" rows="100" wrap="VIRTUAL" cols="55"><a href="http://www.tricksfinder.com/" target="blank"><img src="http://goo.gl/26BNh" /></a></textarea>
</p>
</form>
</div>

In the above code replace the coloured content as your requirements and add your own the widget as a html/javascript or within a post itself.

Red Coloured Content This is the name which is shown in the button.
Purple Coloured Content -  This is the height and width of the text box.
Blue Coloured ContentThis is the content in the text box.

That's it. Now you can change your long huge paragraphs into a graphical text box.

Easy trick to add a GoDaddy domain to your Blogspot Blog

Posted by Tricks Guru In | 7 comments»
Many blogger users are confused with adding a purchased GoDaddy domain to their blogspot blog. Earlier it was a really complicated thing for a simple blogger as it needed to enter the CNAME Records and A Records at the GoDaddy's domain control panel.

This trick will let you easily register your blog with your preferred domain without much hassle.

Recently Blogger introduced a system for their users to buy from their own domain service at a price of $10. But buying a domain from GoDaddy is really cheap because GoDaddy always come up with different coupon codes.

By applying those coupons would rather make your purchase much cheaper. For an example I bought this domain (www.tricksfinder.com) only for $1.67 by applying their special promotional code.

If you are registered at GoDaddy they will send you newsletters on daily basis or weekly basis informing you what are their promotions. Those promotions are normally coupon codes.

Lets see how a domain is applied to your blogspot blog.

Step 1 : First register a domain at GoDaddy and go to the following Link.

Step 2 : Now you will get a box like in the picture below. In the box type your purchased domain. For an example type it like below and confirm it.


Step 3 : Once you confirmed, GoDaddy will automatically update your DNS records which makes compatible to your blog.

Step 4 : Then you need to update the information in your Blogger accounts settings. Go to,
Settings > Basic
In the the area for "Publishing" click on the link to add a custom domain. Then, click on "Switch to advanced settings."

Step 5 : Then enter the purchased domain in the provided text box and save it. That's all.

Within 24 hours your domain will point to the purchased URL. The older users who has your blogspot domain will be redirected to the purchased domain. Once it is updated see whether the URL without www redirects to your domain. If not just go to publishing and tick on the option to redirect without www to a domain with www. See the below picture to just recap your final steps.

Try this few steps if you got some money to purchase a domain.

How to add Dynamic Addthis counters on Blogger Homepage

Posted by Tricks Guru In | 1 comments»
Sharing is one of the most popular ways to distribute your content and bring some traffic for your content. Among these sharing platforms Addthis and Sharethis are the most widely used platforms. Once the viewers look at your content, they share it if they are interested on it.

Eventhough your content is really nice, people don't waste their time in searching a method to share your content to their preferred bookmarking site. But if you have a sharing widget at the end of the post or content, people tend to share it because they don't have to make a specific effort to share it. So they will just click and share.

According to the past trends it has found out that the best place to place the share buttons is just after the end of your content. This tutorial is based on using the Addthis Sharing Buttons.

If you want to track how the sharing has been carried out, simply register a free account at www.addthis.com and get the code. Lets do the trick now.

Make sure you download the template before do editing. First find out the below code from the blog template. Just follow the simple step by step guide.

Step 1 : Go to Edit HTML from the Panel. Then tick on the Expand the Widget Template.

Step 2 : Now find the below code.
<data:post.body/>

Step 3 : Now paste the below code just after the code <data:post.body/> or you can paste the code genarated by add this.

<!-- AddThis Button BEGIN -->
<div class='addthis_toolbox addthis_default_style'>
<a class='addthis_button_facebook_like' fb:like:layout='button_count'/>
<a class='addthis_button_tweet'/>
<a class='addthis_button_google_plusone' g:plusone:size='medium'/>
<a class='addthis_counter addthis_pill_style'/>
</div>
<script src='http://s7.addthis.com/js/250/addthis_widget.js#pubid=xa-4f90c29d33dae96c' type='text/javascript'/>
<!-- AddThis Button END -->

Step 4 : Save the template.
Now you will see the counters are there at the end of the individual posts. But there is a problem. When you go to the homepage you can see all your post counts are same. That's because addthis code take the share counts of home page and applies to the counters at the home page. In order to show your individual post's share counts at home page you need to modify the above code.

Step 5 : It is simple. Just replace
<div class='addthis_toolbox addthis_default_style'> 

with the code below

<div class='addthis_toolbox addthis_default_style' expr:addthis:title='data:post.title' expr:addthis:url='data:post.url'>

If you have already added Addthis code earlier, you have to do only the step number 5. Now you will see that your blog has dynamic share counters at your homepage under the posts.

How to insert any Image into the Facebook Chat

Posted by Tricks Guru In | 2 comments»
Recently I found out that there's a trend towards sending picture messages via Facebook chat. Earlier there wasn't any way to send a displaying picture via Facebook chat. The only option we had earlier was sending the hosted image link.But now there's a way to send images through generating a unique code.

Someone may misunderstand this with facebook smileys. But this is a small square matrix which converts into pixels and creates the image. What you have to only do is just paste the generated code in the chat bar and send.

Add any Image into the Facebook Chat
Anyway we are going to do this through a different site. The site generates the code for any of the image you want. Simply follow these few steps.

Step 1 : First go to - http://smileyti.me/

Step 2 : Select the image you want to convert into FB Chat code

Step 3 : Solve the captcha puzzle and upload it.

Step 4 : Copy the generated code and send it in the chat box.

That's it. Just to check it you can check it with the following code. It's the logo of this site.

[[283625558396818]] [[283625561730151]] [[283625555063485]] [[283625548396819]] [[283625551730152]]
[[283625661730141]] [[283625668396807]] [[283625665063474]] [[283625675063473]] [[283625678396806]]
[[283625745063466]] [[283625741730133]] [[283625751730132]] [[283625748396799]] [[283625758396798]]
[[283625828396791]] [[283625815063459]] [[283625818396792]] [[283625821730125]] [[283625825063458]]
[[283625895063451]] [[283625908396783]] [[283625905063450]] [[283625901730117]] [[283625891730118]]

Happy Chatting in Facebook with your desired images.

Top Rated List of Free Anti Malware Cleaners

Posted by Tricks Guru In | 0 comments»
Maximum defense for your computer can be given by many ways. There are programmes which give a different kind of a protection than usual anti-virus programmes. You can get the same protection or guard for your computer even without these anti-virus programmes. Or else you can use these with your exiting anti virus software.

These software are commonly known as "Malware Cleaners". The below are the top six popular and trusted programmes.

McAfee Site Advisor
McAfee Site Advisor tool can be used to find out the malware before landing the desired website. With this you can minimize the affection of viruses and malware to your computer. This service is given freely by by McAfee. You can download this and install free at www.siteadvisor.com Once Installed you would see a green colour button at the top of your browser. Now when you search through google, yahoo or any other, you will get a detailed pop up in front of every search result.

Malware Removal Tools
Microsoft Safe Scanner
This is a free software released by Microsoft Corporation to scan viruses. You can remove all your computer's malware through this. Once downloaded you can use this for ten days. After that you have to download this again. Hence there's no need for you to update this software. You can download this from www.microsoft.com/security/scanner

PC Tools Spyware Doctor
This is a simple but a powerful software to find out the rooted malware of your computer.This software not only finds malware but stops their activities. This gives the protection to your web browser too, so that it stops the incoming of malware from the internet. You can download a free version of this software from www.pctools.com/spyware-doctor

Ad-Aware
This programme has the ability to stop more than a billion malware programmes. This is really easy to use and it's with rootkit removal technology. From www.lavasoft.com you can download the software free.

Spyware Terminator
Spyware Terminator is backed with both spyware removal and anti virus protection. It's database will be automatically updated everyday. Hence the latest information on the new spyware is always there with the programme. You can download a free version of this software from www.pcrx.com/spywareterminator

STOPzilla
This is a speedy computer defense tool. This enables to remove each kind of malware from your computer. You can download a free version of this too from www2.stopzilla.com

How to recover a scratched CD?

Posted by Tricks Guru In | 0 comments»
We have seen that most of the people who used Compact Disks are now moving toward electronic media devices like USB Drives. But at early days there was no such facilities. So people used to save the data on Compact Disks (CDs). Normally CDs were used to keep saved their memories in photos, videos etc.

But with the CDs getting older, they come up with issues on durability. Most of the CDs are now found with scratches. For an example if we are playing an old Video CD, the videos are not played continuously. They get stuck or not responding accurately. So what if your CD's were found with scratches? How do you recover the data which were on it?

This is simple a way how you can cherish your memories by recovering from those scratched CDs.

Step 1 : First take a soft cloth. Place that cloth on a flat surface. Make sure the cloth is not wet. Place the CD on the cloth.

Step 2 : Now hold the CD on one hand and smoothly wipe the CD with the soft cloth. Give more concern to the starched areas. Don't hold the CD tight. Simply do some short and smooth strokes on the CD along the scratched areas. But don't rub it across the scratched area. This will make the scratches worse.

Step 3 : If you see no scratches wash the CD with some water. Don't wipe it with clothes if it's wet. Let it be dry, now you can play the CD.

You can use some toothpaste too if the scratches are deep.It will remove most of the smaller scratches and more of the deep scratches. But this should also be wiped along the scratch, not across the scratch.

Add a nice customized Paypal Donate Button to your Blog

Posted by Tricks Guru In | 4 comments»
People who are interested in blogging really keen to earn few bucks for their hard working. Most of them use advertising networks for this purpose. Anyway it is a good idea to add a Paypal Donate button to your blog because Paypal is one of the largest and most recognized online money possessing system in the world.

On the other hand adding a Paypal donate button will generate some advantages for you than advertising networks. This will make your happy readers to say a big thank you by simply allowing them to donate few bucks for your nice attempt and hard working on posting the useful stuff.

Let's see how this is done. This can be done in two different ways. One is a step by step guide by logging into your Paypal. The other one is a ready made HTML code which you need to simply replace your paypal email. It's really simple.

Firstly let's follow this step by step guide and get the code using Paypal.

Step 1 : Log into your Paypal account.

Step 2 : Go to Merchant Services Tab from the Top Menu.

Step 3 : Look for the Donations link and click on it. Normally it is at the section "PayPal Website Payments Standard". There you will find "Donations" link at the right side box.

Step 4 : Then you will get a three step form to be filled in. In that choose button type as "Donations" from the drop-down menu. If you wish fill the "Organization name/service" and "Donation ID" text boxes. It will track the donations for you if you are putting this donation button on several sites.

Step 5 : Select a Donation button. If you want to put your own donation button, you can give the relevant image URL for that. Fill the necessary information and go to the next step. It is recommended for you to select "Use my secure merchant account ID" in order to protect your email address from spammers.

Step 6 : Customize your checkout page with allowing them to leave a message to you by checking "Can your customer add special instructions in a message to you?". Set customers shipping address as not needed. It will remove complications and will be much more convenient to the donor.

Step 7 : Click on the create button and get the relevant HTML code. Copy that  code and paste it in a HTML/Javascript.

Congratulations! That's it. Now you have a nice donate button for your website.

Now we'll go for the easy method. The main drawback of this method is your Paypal email is visible to others. If you are worried about spam emails, it's better you stay out from the below simple method. Here's the simple code.

<form action="https://www.paypal.com/cgi-bin/webscr" method="post" "target="_blank">
<input type="hidden" name="cmd" value="_xclick" />
<input type="hidden" name="business" value="Your Paypal Email Address" />
<input type="image" src="https://blogger.googleusercontent.com/img/b/R29vZ2xl/AVvXsEgDxNdaPzPyoAq3KWhySugszniRlYSHrTVznU9LloAdoAvHk8wi18KmaUFqaB-ASgR0lrtMM2xgtfnJcGFyXblF3BFBrESSBq7rNQTKBv50rm2GQ3r7fcvfiCi4VYW81QVncrVd46xEWr8/s1600/paypal.png" border="0" name="submit" alt="PayPal - The safer, easier way to pay online!" />
<img alt="" border="0" src="https://www.paypal.com/en_US/i/scr/pixel.gif" width="1" height="1" />
</form>

What you have to only do now is copy this to a HTML/Javascript and replace the red colour text with your Paypal email. Place the code in any place where you like to place your donate button.

Update Windows OS in your Computer without Internet

Posted by Golden Dragon In , | 0 comments»
Microsoft Corporation will issue some security and needed updates frequently. So these updates will be more important for newly found bugs and for your computer's efficiency. But if you don’t have internet
facility at home or if the internet connection is very slow then you will not able to get these windows updates.

So here you will find a simple way that enables you to update Windows OS of your computer without internet facility.

For this purpose we have to install software called Autopatcher. By using this Autopatcher software we can download all the updates that available for windows and can save those updates in your computer which can be installed later without internet.

For this purpose you have to download all this windows updates from internet café or any other computer which has internet facility. Then you can bring those updates to your computer by using a USB drive or any other media.

Now give your attention to the following steps.

• First download the Autopatcher software using the given link here.


• Then install this software as a normal way an open the software.

• After open the software then selects the Operating system which you need and click next.

• Then select x86 if your computer operating system 32bit. Otherwise select x64 if the operating system 64bit.

• Now you can see the list of all updates available for your operating system.

• Select all those updates and click on the download button.

• After downloading all these updates then copy paste all updates to your pen drive.

• Then you can connect pen drive to your computer and can install all these updates to the computer.

By using this way you can download and install all available updates for Windows XP, Windows 7 and Vista to your computer.

What's the best platform to start a blog?

Posted by Tricks Guru In | 1 comments»

Normally the beginners who are going to write a blog will face some questions and difficulties such as can I write a blog for free of charge, how many blog services are available, what is the mostly used blog services, what is the most facilitated blog service available, etc

When you go through these questions one by one you will be able to find two main services available. They are Blogger and Wordpress.com. These two platforms are the most popular among blog writers. 

Now another question might have arisen. That is what the most suitable blog service out of this two is.  This would give you a good analytical answer by comparing the quality of these two services. Here I will do compare between blogger service and wordpress.com service. Do not make confusion on wordpress.com with wordpress.org.

Facility

Blogger.com
Wordpress.com
Best One
Ability to change Template
You can do this freely. Can change template layout and CSS as your wish.
You cannot do this free of charge. Should have to pay a fee.
Blogger
Tutorials/ Help
You can find massive help tutorials through internet.
Less than blogger.
Blogger
Usable blog themes
You can find many good blog themes/ template through internet freely.
Rare chances on getting good blog themes through internet.
Blogger
Essential coding parts
Can use HTML, XHTML, CSS, XML, and JAVASCRIPT. These are easy to learn.
In addition to HTML, XHTML, CSS, XML, and JAVASCRIPT you need the PHP knowledge which is harder than other languages.
Blogger
The outfit of the dashboard, easiness to use and the speed.
Very simple, easy to use and more speed.
Complex and slower than blogger.
Blogger
Recommended quantity of themes/ templates and their situation.
Less quantity of themes and are not in good appearance.
Provide nice set of themes over 100, which have really good appearance.
Wordpress
The ability to replace themes/ templates
You can do this replacement freely and many times by using self made theme or an external one.
You can do this only for themes which provide by the wordpress. Cannot use external themes.
Blogger
Ability to use Widgets and plugins.
Both can use widgets and plugins which provide by the blogger or external party.
Cannot use external plugins.
Blogger
Comments System
Only has facility to delete a comment under comment moderation. Cannot edit the comments. As well as no spam protection. You cannot reply directly to the comments. That means there’s no threaded/nested commenting facility. There is Captcha facility and can build using external commenting system.  
Can edit comments and has a spam protection. Has threaded/nested commenting facility. And can build using external commenting system. 
Wordpress
SEO optimization
You can do SEO techniques as your wish.
Can use within a limit. This will be change the used theme's Symantec Structure from user’s side.
Blogger
Blog Privacy
You can limit a one blog for 100 owners and 100 readers. This is allowed for people who has google accounts. You cannot use passwords for the posts.
This will be limit for 35 readers. You can use a password for the post as well as can create post which is visible only for you.
Blogger
Comment Restriction
This can be limit under the type of google accounts. OpenID account and Anonymous.
This cannot be limited. Any one can post a comment.
Blogger
Blog Import
A Blog can be import only for another blogger blog. (There are external services available.)
Import can be done for another wordpress blog and for Type pad, LiveJournal, Yahoo!360, MovableType
accounts.
Wordpress
Posts and Comment Notification
This can be done by using email. Most probably Google Feedburner will use for this purpose.
Same as blogger
Both
Comment Verification
Can be verifying a human by using captcha facility.
There’s no that kind of service.
Blogger
Video Storage Limit
If you upload a video through this service then allow 16GB. Also can use unlimited service through google video.
Only allow for 3 GB. If you want more then have to pay.
Blogger
Image storage limit
You can own 1GB size of space through Picasa Web Album.
Only allow for 3 GB. If you want more then have to pay.
Wordpress
File type Storage
Limit for PNG, GIF, and JPEG file type.
Can use PNG, GIF, and JPEG file type. In addition can use ppt, .doc, .odt and .pdf file types.
Wordpress
Blog Stats
Include a system for that purpose. Also can use google analytics service.
Less descriptive compared to blogger. Update will be done after 2 days. Not allowed for the use external services.
Blogger
Advertisements
Can use advertisement freely.
Cannot use advertisement. If you need you can get this service by paying some fee but a part of the income will be shared by them.
Blogger
Posts by email
Can be done
Can be done
Both
Post Feed On Mobile Phones.
Will support
Will support
Both

Hope this comparison give a better idea on the difference between blogger and wordpress.com. So it's up to you to select the best blogger service which optimize your requirements.

Set a password to your computer’s USB ports

Posted by Tricks Guru In | 0 comments»
Today's topic is about how to set a password for your computer USB ports. Probably this might be one of the most important topics for most of you. There is a risk that people can take our data through a USB drive if our USB ports are not locked. But if we can put passwords to our USB ports, no one can transfer data from that USB without the correct password.

By following this simple tutorial you will be able to protect your private and very confidential information from anyone because no one can get this information across the USB port.

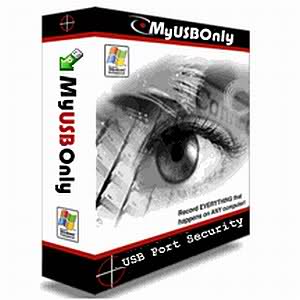
For this purpose we use special software named as "MyUSBOnly". Let’s talk about features of this software firstly.

Features of MyUSBOnly: 

  • Prevent data loss while you are away from home or computer. 

  • Stop information leakage such as documents, photos and videos. 

  • Prevent un-trusted USB storage devices from various users. 

  • Secretly log all USB connect and disconnect activity. 

  • Get an email notification message when an unauthorized USB storage device is connected to your PC.

Then let’s see how to use it. First what you have install this software to your computer. For that just download this and install the below zipped file which includes a crack if you need to use it lifetime. Otherwise install the trial version. This has been tested by Avira that Crack has no viruses, trojans or malware.


After installing this software you will be able to see a USB icon on system tray of your computer. Double click on it and select “General Setup”.

Then type four zeros (0000) in the field called “Required Password” and click allow. (0000 is a default password in this software and you can change this later if you want.)

After that you can customize your ports as your wish. For a step by step tutorial use the Manufacturers Detailed tutorial with this link.

http://www.myusbonly.com/usb-security-device-control/screenshots.php


Make sure you do this simple trick for protect your private information from others.